Learn how to make harvest apple jelly without using added pectin. This delicious apple jelly recipe without pectin tastes like autumn and is simple to make. Directions are also included to preserve apple jelly.
How to make apple jelly without pectin
Autumn is my favorite season. What's better than apples, pumpkins, cooler weather and colorful leaves?
The foods of autumn are rich and flavorful, and often colorful as well.
This post will teach you how to make an autumn staple - apple jelly - without using added pectin. The apples contain enough natural pectin that commercial pectin isn't needed.
And if you're looking for a delicious apple jelly recipe for canning, this simple, pectin-free option captures the flavors of fall and is perfect for preserving.
Alternative uses for jelly
Our apple trees didn't produce much this year. I only picked two buckets full of small apples. I didn't want to have to peel those little apples, so instead of applesauce, this year I made apple jelly.
While we aren't big jelly eaters, I use a lot of jelly in slow cooker sauces. There are a lot of recipes using jelly as an ingredient that are absolutely delicious.
My favorite sauce is in "dump chicken," for instance, where you simply dump 2/3 cup jelly, 1/3 cup of ketchup and 1/3 cup of soy sauce in your slow cooker with the raw chicken, and let it cook on Low until the chicken is done. Yum.
You can add a dash of hot sauce and some chopped garlic too, if you wish. Baste the chicken with the sauce occasionally while it's cooking.
Apple jelly is a delicious glaze for roasted meats, especially pork.
And of course apple jelly is delicious on biscuits, toast and other breakfast foods.
Apple jelly can also be used as a substitute for these ingredients in recipes
- Pear jelly or preserves
- Apricot jam or jelly
- Peach jam
- Honey
APPLE JELLY RECIPE FOR CANNING
I use my slow cooker to make apple jelly, but you don't have to. Any pot that's big enough to hold the ingredients will work.
How to make apple jelly without pectin
Adding commercial pectin to fruit makes jelly-making quick and easy with a high chance of success, but it isn't necessary to add boxed pectin to this apple jelly.
Apples contain a high amount of pectin, so if you're making apple jelly, you can skip the pectin box.
In fact, pears, plums and several other fruits also contain lots of natural pectin. The highest amount of pectin is found in the peels or rinds, seeds and cores of these fruits.
You can even make homemade pectin from apples to use when you make jelly with other fruits.
Apples that are slightly tart and a bit under-ripe will contain more pectin than the sweeter varieties. If the apples are from your own trees, it's easy to include some less-ripe fruits.
I like to use a combination of apple varieties, including some tart fruits. Using more than one variety gives the jelly a rich flavor, not too tart and not too sweet.
NOTE: commercial pectin only produces a thicker gel for your jelly. It doesn't lengthen the shelf life of foods at all.
Preparing the apples
Wash the apples well by soaking them in a sink full of water with a splash of apple cider vinegar in it for about 30 minutes.
Remove the stems and cut the apples in half or quarters, depending on the apple's size. Don't even peel or core them. Simply toss them into the slow cooker.
Add enough water to cover them, about 4 pints. The amount of water will vary depending on how many apples you have and the size of your slow cooker.
Making the juice for jelly
Let the water and apple pieces simmer for several hours, either in a slow cooker or in a stock pot on your stove. I love my Crock-pot which tends to the cooking while I do other things. Multi-tasking is a great thing!
When the apples are soft enough to poke a fork in them easily, use a potato masher to smash the fruit and release more juice and flavor, and let them simmer a bit longer.
Strain the liquid from the apples. The cooked apples can go on your compost pile, or you can feed them to your chickens, pigs, or your worms - after they cool down, of course.
Return the strained liquid to the slow cooker or stock pot. Simmer uncovered for about an hour so the liquid will reduce down a bit. I had about 3 pints of juice after this step.
The Ball Blue Book of Canning advises straining the juice for jelly in cheesecloth or a jelly bag, and not to squeeze it. Squeezing will give you cloudy juice.
Personally I don't mind if my jelly is a bit cloudy. I just use my metal strainer over a large bowl to catch the juice, pouring it through a clean cloth in the strainer and then squeezing out every bit of the juice.
How to make apple jelly from apple peels and apple cores
By the way, you can make apple peel jelly using this recipe too, instead of using the whole fruit. Here's how to make juice for jelly from any fruit or fruit scraps, including apples.
Yes, you can use apple scraps to make this jelly! When I can apples or make apple pie, I put all the peels and cores in a freezer bag and keep them until I have enough for a batch of apple peel jelly.
Apple peel jelly is just as delicious as that made from whole apples.
The pectin is found just underneath the peel, so most of my batches of Harvest Apple Jelly set up just fine, but when they don't, I use it as pancake syrup and ice cream topping.
Follow the directions for making juice for jelly in this post, using the apple peels and cores.
How did I get that lovely color in my jelly?
Commercially-canned apple jelly usually looks pretty pale compared to my jelly. Why? Because they peel the apples they use.
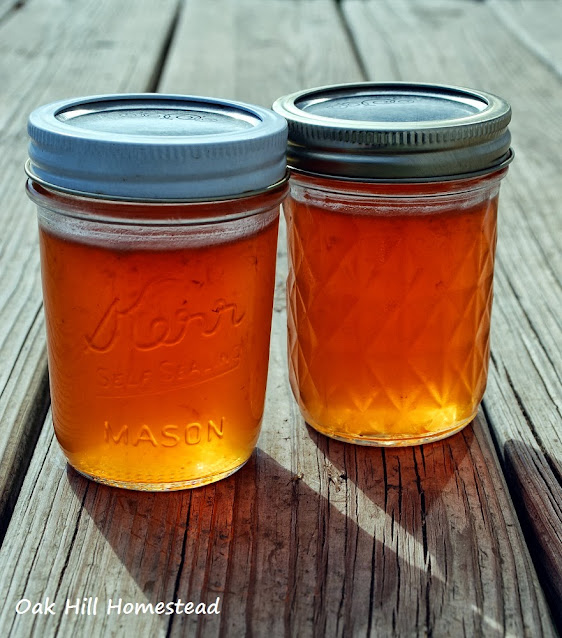
This lovely peachy color is due to the color of the apple peels - because I don't peel the apples. I think the peels give the jelly a deeper, richer flavor too, as well as being a source of natural pectin.
The color of your apple jelly will depend on the variety of apples you used, of course. Using yellow or green apples won't give you red jelly, but it will still taste good!
Of course, any chemicals that might have been sprayed on the trees as the fruit grew would be on the peels, so wash the apples very well, or use organic apples. We have several apple trees so I know that the fruit I use is untreated.
Gather your jelly-making equipment
Making jelly is a two-step process. First you make the juice, and then you turn the juice into jelly. Now that you've made the juice, let's make jelly!
Gather your canning equipment before you start making the jelly.
Wait, do you have to can the jelly? No, you don't. You can pour the finished jelly into jars, put the lids on, and keep them in the refrigerator.
But if you want your jars of harvest apple jelly to be shelf-stable and keep longer, you should can them. Fruit is high-acid, so water-bath canning is sufficient.
As soon as we've cooked the jelly, we'll pour it into jelly jars, so let's gather the canning equipment and everything we'll need before we begin, okay?
You'll need:
- water bath canner with rack
- clean jars - this case of 8 oz jars includes lids and rings, 4 oz canning jars are also appropriate
- lids and rings
- jar lifter
- canning funnel

You can purchase a set of canning tools that includes the jar lifter, lid lifter magnet, funnel, bubble remover, kitchen tongs and jar wrench from Amazon.
Next, check the jars for any chips in the rims.
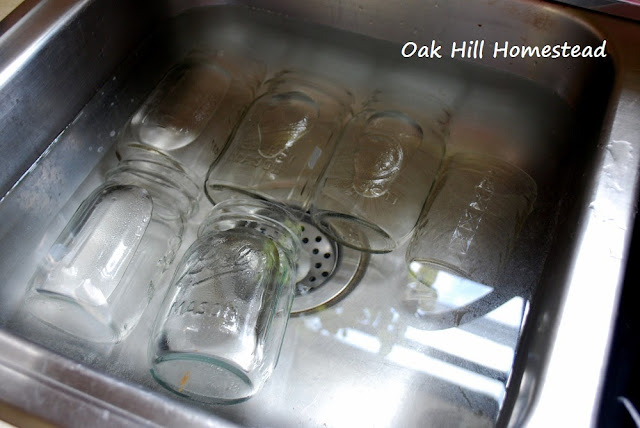
If you're canning something for more than 10 minutes, you don't need to sterilize the jars, but jelly doesn't require a long canning time so they should be sterilized before using. I run them through a dishwasher cycle.
Keep the clean jars warm while you make the jelly by placing them in a sink full of hot water until they are needed, or keep them warm in the dishwasher after the "heated dry" cycle.

Fill the water bath canner about half full of water and bring it to a simmer - filling hot jars with hot jelly and placing them into hot water in the canner will help prevent jar breakage.
If you don't have a water bath canning kettle, you can improvise with a deep stock pot and a rack that keeps the jars up off the bottom of the pot. You'll find more canning tips like this in my post about frugal canning hacks.

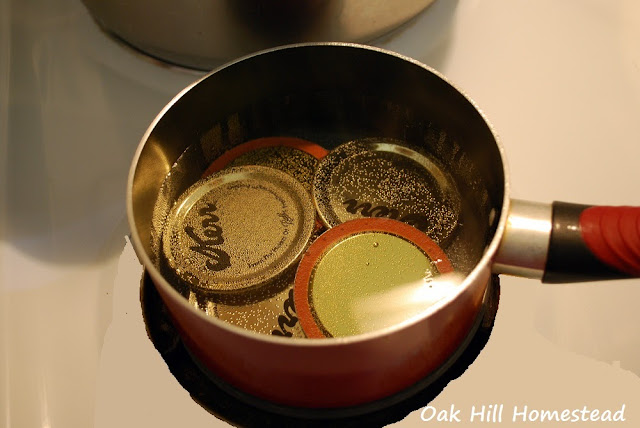
Put the lids in a saucepan of warm water to soften the rubber. It isn't necessary to boil the lids.
I alternate the lids in the saucepan - one up, one down, etc - so that they don't nest together. It's much easier to remove them from the hot water one at a time.
Make the jelly
Now we need to switch to a large saucepan on the stove. A slow-cooker won't maintain the hard rolling boil that you need for jelly making.
Measure the apple juice you made in the slow cooker, and add 3/4 cup of sugar for each cup of juice. I had 3 pints of juice (6 cups), so I used 4.5 cups of sugar.
You can add 1 teaspoon of butter (not margarine) to help prevent foam, the bubbles that form on top of the boiling juice.
NOTE: I didn't do that and there's lots of foam in that kettle in the photo below! If this happens you can skim most of the foam off with a spoon, but believe me it's rather tedious. It would be much easier to add the butter.
Boil the fruit and sugar for about an hour. Pectin isn't necessary for apple jelly, but the juice does require longer boiling than if commercial pectin were used.
I boiled the juice for an hour, stirring often to keep it from burning, then began testing the juice by putting a bit from a spoon onto a saucer and sticking it in the refrigerator. After a few minutes, remove the saucer and tip it to check the thickness of the juice.
I had to test mine twice, but the second time it gelled on the plate after a few minutes in the fridge. That means it's ready to put in the jars.
Canning apple jelly
Ladle the hot jelly into warm canning jars using a canning funnel.
Wipe the rims of the jars with a damp cloth to remove any drips, and set a new, flat lid on each jar. You should always use a new lid when you can something; re-used lids can't be trusted to seal correctly.
Place a screw ring (also called a "band") on each jar and tighten until it's finger tight. Don't over-tighten it.
(The latest recommendations are to tighten the rings just a bit more than finger-tight - but still, don't over-tighten them.)
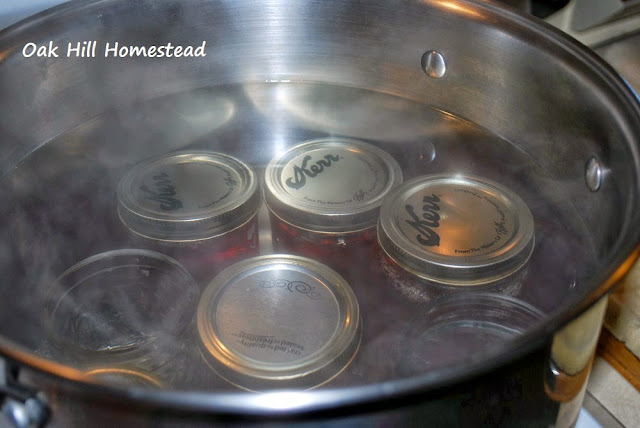
Using the jar lifter, place the jars on a rack in your water bath canner.
Be sure the jars are covered with at least one inch of water. Add more boiling water if you need to, to get at least an inch or water above the jars.
How can you tell if the water is deep enough? Stick the handle of a wooden spoon into the water to the top of a jar. Pull it out, and the wet handle will tell you how deep it is. (You'll find more great tips like this in my Canning Tips and Tricks post.)
Cover the canner with the lid and turn up the heat on the burner. When the water begins to boil, begin timing.
Apple jelly requires 5 minutes of boiling in a water bath canner. If you live at a higher altitude than 1,000 feet, you'll need to increase the processing time.
To find your elevation, go to Free Map Tools, then scroll down and type in your city and state.
While the water is boiling and your jelly is processing, don't lift the canner lid.
When the time is up, turn off the heat, remove the canner lid by tipping it away from your face so you don't get burned by the steam, and let the water cool down a bit before you attempt to remove the jars.
Use the jar lifter to carefully lift the jars straight up (don't tilt them), and out of the canner. Place them on a folded towel on the kitchen counter in a draft-free place. The lids will start "pinging" as the jars seal.
Leave the jars undisturbed for 24 hours, then test the seal by gently pressing the lid with your index finger. If the lid remains firm when pressed, the lid sealed correctly.
If the lid bounces up and down, the jar did not seal and will need to be reprocessed (from the very beginning: the jelly heated up, put into a new jar with a new lid, etc) or kept in the refrigerator and used soon.
Wipe the outside of the jars clean, remove the screw rings (not the lid, just the ring), and label the jars.
What if the jelly doesn't gel?
Sometimes, even if we use commercial pectin, a batch of jelly just won't gel.
But all is not lost. In my opinion that batch of "apple syrup" is delicious! Try it on pancakes and waffles, on ice cream, or in other desserts. And of course it still works perfectly in that Dump Chicken recipe near the beginning of this article.
Or use the tips in this post from Pick Your Own.org to fix runny jelly.
Conclusion
This batch of jelly tasted like an autumn day and the way that apples smell. Yours will depend on the flavor of the apples you use. The taste can also vary from year to year, but your Harvest Apple Jelly will always be delicious!
For more food preservation and simple, frugal living tips, subscribe to The Acorn, Oak Hill Homestead's weekly-ish newsletter, and join me on Facebook, Instagram and Pinterest.
Blackberry Jam and Triple Berry Jam
How to make juice for jelly from any fruit or fruit scraps
Facebook | Instagram | Pinterest | Subscribe


