Learn how to freeze fresh corn on the cob (and off the cob, too!). From blanching to freezing and packaging, this guide will help you preserve the fresh flavor of summer's sweet corn.
How to Freeze Fresh Corn on the Cob
A local family farm is harvesting their sweet corn this week and selling it by the bushel. Our whole community lines up to buy their fresh corn as soon as it's harvested
Fresh corn is at its best when cooked and eaten - or frozen or canned - within a few hours of picking, so when folks buy corn they don't stop until it's all canned, in the freezer, or on the grill for dinner.
Even though corn on the cob takes up more room in the freezer than kernel corn, it's the best way to eat sweet corn!
I'm going to show you how to freeze fresh corn on the cob AND give you a quick lesson in freezing corn off the cob too (aka kernel corn).

Choose the right variety of corn
When it comes to freezing corn, the variety you choose can make a significant difference.
Sweet corn has a higher sugar content than feed corn (corn grown to be fed to licestock, such as cows).
These varieties have been developed and bred for their tender, sugary kernels. The natural sweetness and delicate texture hold up well during the freezing process.
Sweet corn is picked before the kernels are fully mature, before the sugar content turns into starch.
Feed corn is grown as animal feed, and has tougher, starchy kernels. While feed corn can be frozen, the texture and flavor isn't nearly as appealing to us humans.
Usually the corn that you'll see for sale in the summer time at farmers markets, roadside stands and in the grocery store, is sweet corn.
Choosing the best variety of sweet corn to grow in your garden
If you're growing your own corn, be sure to choose a variety that is sweet and sugary. Sweet corn varieties fall into three categories: normal sugar (which is labeled SU), sugar enhanced (SE) and supersweet (SH2).
The seed catalog or seed packet should state which strain the seeds are.
Sugar enhanced (SE) varieties contain a gene that raises the sugar content. Normal sugar (SU) varieties are the best to grow when your goal is to pick, husk and eat (or freeze) fresh corn as soon as possible after harvest.

Choosing the freshest corn
The freshest corn is the tastiest corn!
To choose the freshest corn, first check out the husks. They should be nice and green, and tightly wrapped around the ear of corn.
If the husks are dry, more tan than green, and loose around the ear, look for fresher corn.
Next, check the corn silk, the tassel of "threads" at the top of the husks. The silk should be pale, not dark. It should feel a bit sticky, not dry. The ends of the tassels will be darker-colored than the silk closest to the cob.
Pull back the husk a little, and check out the appearance of the kernels inside. They should be plump, not dried-out-looking.
And finally, check the bottom of the ear where it was attached to the cornstalk. This cut should look fresh, not dried out or brown.
How to prepare fresh corn for freezing
Prepare your sweet corn as soon as possible after harvesting or purchasing. If necessary, store corn in the refrigerator until you are ready to begin.
When sweet corn is stored, the sugar begins to convert to starch, which affects that delicious flavor, so don't procrastinate!
Shucking and removing the silk
Begin by removing the corn husks - this process is called "shucking" - and the corn silk from the cobs.
- Grasp the husks at the top of the ear and pull downwards to remove. Pull sharply away from the ear at the bottom.
- Use a stiff vegetable brush to remove the silk from the corn.
- There might be a "handle" left after you remove the corn husks. If so, cut off the end of the corn ear where the husks were attached with a sharp knife. Then cut away the tip of the ear, including any portion with undeveloped kernels.

How to blanch corn on the cob
Blanching corn is a process that stops the action of enzymes that will destroy the nutrients and change the color, flavor and texture of corn and other preserved vegetables.
To blanch corn, bring a large kettle of water up to a rolling boil. Add a couple of cleaned ears of corn at a time, and bring the water back to boiling.
Begin timing when the water returns to a boil after you add the ears of corn. This should happen pretty quickly.
If the water takes several minutes or more to return to boiling, reduce the number of ears you blanch at a time.
Boil the ears of corn for 7-11 minutes. How long to blanch corn depends on the size of the ears. Allow 11 minutes for larger ears over 1.5 inches in diameter, and 7 minutes for small, thin ears of corn.
After blanching
When your kitchen timer dings, remove the ears of corn from the boiling water and plunge them into a bowl or sink of ice water. The ice water stops the heating process, so the quicker you can cool the corn, the better.

As the ice melts, add more. Leave the corn in the ice water for the same amount of time as you blanched it.
Then place the ears on a towel so the excess water will drain off.
Packaging corn for the freezer
Tightly wrap each of the cooled ears of corn in plastic wrap, then place them in a zippered freezer bag, label and freeze.
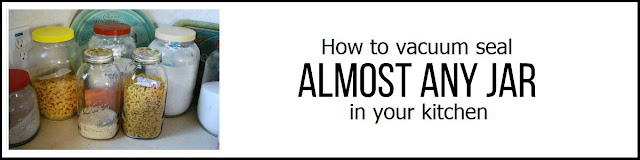
Freezing corn with a Foodsaver vacuum sealer
Even better, use a Foodsaver appliance to vacuum-seal the wrapped ears of corn and keep the freshness in even longer.
If you find that your Foodsaver sucks up some of the liquid in the kernels, put the unsealed bags of corn in the freezer for an hour, then vacuum-seal them.

Label your freezer bags with the contents and date.
Frozen corn on the cob should be eaten within 6-9 months for the best quality and taste.
How to freeze corn off the cob (kernel corn)
Corn doesn't have to be frozen on the cob, you can freeze the kernels separately if you wish.
I know, corn on the cob is a summer staple, but freezing corn off the cob has its benefits too.
- It's easy to use just a portion of a bag of corn in a recipe such as my Tortilla Soup.
- You can fit more delicious corn in your freezer.
- Corn kernels have a shorter blanching time.
- Frozen corn kernels also last longer in the freezer.
Begin by shucking the ears of corn and removing the silks, as we did above.
How long to blanch corn off the cob
Blanch the ears of corn for 4-6 minutes, then plunge the ears into ice water to stop the blanching action. Larger ears of corn should be blanched for longer than small ears.
Chill and dry the ears as discussed above.
To cut the kernels off the cob after blanching, place the pointed end of the ear of corn in the center of an angel food cake or Bundt pan.
Use a sharp knife to cut downwards and remove the kernels. The cake pan will catch the kernels.
That's one of my favorite kitchen tips! No more kernels flying around on the kitchen counter. You're welcome!
Then package the kernels in meal-size portions in a zippered freezer bag or Foodsaver bag.
Frozen corn off the cob (aka whole kernel corn) will last 8-12 months in the freezer before the quality begins to decline.
")
What do with leftover corn cobs
If you've removed the corn kernels from the cobs before freezing (or if you have a mountain of corn cobs leftover after a big summer barbecue), try making this unusual delicacy.
Corn cob jelly might sound kind of odd, but it's delicious! It tastes like honey, and can be used on toast, biscuits and so on.
I love being able to make "something" out of scraps that would normally go in the garbage or the compost pile. You can learn how to make corn cob jelly here, from Taste of Home.
You'll find the rest of my food preservation tips and recipes here.
For more self-sufficient and homestead posts like this, subscribe to my weekly-ish newsletter The Acorn, and join me on Facebook, Instagram and Pinterest. I'd love to see you there!
")
no matter your circumstances or where you live. Join me here:
Facebook | Pinterest | Instagram | Subscribe