You don't have to grow Roma tomatoes in order to can tomatoes. Any type and variety of tomatoes can be canned, including beefsteak and salad-type tomatoes. You can use a water-bath canner or a pressure canner to preserve tomatoes. Find the directions in this post.
How to can tomatoes, even if they're not paste tomatoes
I'm swimming in tomatoes right now.
Okay, not literally, but I have a whole bunch of them - five dozen or more spread out on the kitchen counter in various stages of ripeness.
I was complaining about this to a friend, who told me to can those tomatoes. But they're not paste tomatoes, I said. I had a combination of beefsteak, salad tomatoes and even cherry tomatoes.
My friend said it doesn't matter, there will just be more liquid in the jars if you're not using paste tomatoes. Turns out she cans "regular tomatoes" all the time.
You can can tomatoes, no matter what kind you're growing. They don't have to be paste tomatoes.
So I canned them the very next day. I couldn't let all those sun-ripened, delicious tomatoes go to waste.
This has been a stellar year for tomatoes here in Oklahoma; I've never had a crop this prolific. They're beautiful, perfectly shaped, no cracks, and no blossom end rot.
So canning them was the most efficient way to preserve them for future use.
Sterilize your jars before you begin canning tomatoes
Before you start canning, use one of these two methods to sterilize your canning jars:
1. Wash the jars by hand in hot, soapy water.
Rinse well, then put them in a water bath canner or large stockpot filled with warm-to-hot water. The water should be at least one inch above the tops of the jars.
Bring the water to a boil, and boil the jars for 10 minutes.
Turn off the burner and leave the jars in the hot water until you're ready to fill them.
Before filling, empty the jars, then turn the jars over on a kitchen towel to let the water run out.
OR
2. Run the jars through a cycle in the dishwasher. Most dishwashers have a "sterilize" cycle.
Then use the Heated Dry option and leave the jars inside the dishwasher until you're ready to fill them so they'll stay warm.
Prepare an extra jar or two
I always prepare an extra jar or two, just in case I discover that one of my prepared jars has a rough spot on the rim, or I notice a crack in a jar.
Sometimes I have an excess of tomatoes (or whatever I'm canning) that just won't fit in that last jar. I fill up - or partially fill - an extra jar and put it in the refrigerator to be used within a day or two.
Remove the tomato peels - the easy way
The next step in canning tomatoes is to remove the peels.
This is my least favorite part of canning, but I have a secret!
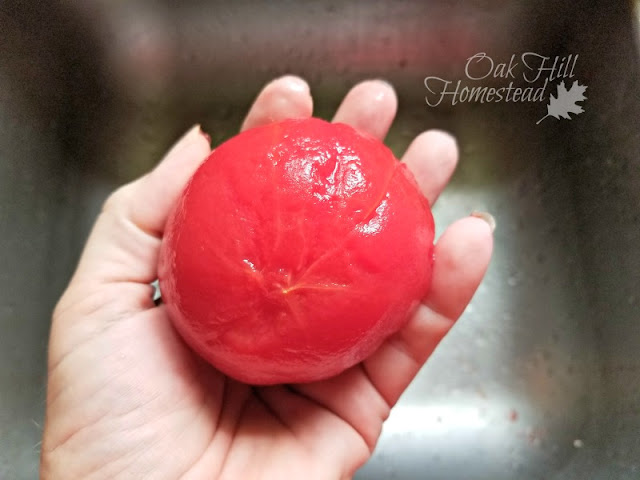
I've learned that if I put the tomatoes in the freezer overnight, then run them under hot tap water, the skin slips right off very easily.
Seriously, this really works. Give it a try!
But - if you didn't put them in the freezer yesterday - you can peel them the traditional way. Here's how:
How to peel tomatoes the traditional way
Bring a large pot of water to a boil.
Poke the tomatoes with a sharp knife to make a slit in the skin.
Add a few tomatoes to the boiling water, no more than one layer of tomatoes at a time, and blanch them.
Blanching is the process of dunking the tomato or other fruit or vegetable in boiling water for a short time to loosen the skin.
So, add your tomatoes to the boiling water. This will lower the water temperature and it will stop boiling for a few minutes.
Once it returns to boiling, start timing the blanching process. After about 30 seconds or so, you'll see the peel beginning to curl up.
Remove the tomatoes from the water with a slotted spoon and immerse them in ice water for a few minutes to stop the cooking process.
The peels should come off pretty easily after this, but if you still have trouble you can blanch the stubborn tomatoes again.
Do you have to remove the tomato peels?
No, you don't. It's up to you. However, canned tomatoes that include the tomato peels have a grainy texture, and the peels lend a bitter taste.
You'll be happier with your canned tomatoes (or tomato sauce or spaghetti sauce or whatever) if you take the time to remove the skins first.
Then add the tomato peels to the compost pile - you can read about composting at that link, which is the eco-friendly way to get rid of kitchen waste. Or give the peels to your chickens.
Raw pack or hot pack methods
I use the raw-pack method of canning tomatoes. Simply put, this means that I add the raw tomatoes to the canning jars and fill with water, then add them to the canner.
Hot packed tomatoes are cooked before they are added to the canning jars.
While it's more work to use the hot-pack method, you might like the results better. The taste is about the same, but hot-packed foods are prettier.
Raw-packed tomatoes (and other fruits) tend to float in the jars, with a lot of liquid in the bottom of the jar. But the raw-pack method is faster and easier, and is the way I can my tomatoes.
Using the raw pack method to can tomatoes
After removing the peels from the tomatoes, cut out the cores and quarter the tomatoes with a sharp knife.
I use the cold-pack (or raw pack) method of canning tomatoes - which means it isn't necessary to cook the tomatoes before canning.
Add citric acid or lemon juice
Because tomatoes are acidic, they can be water bath-canned rather than pressure-canned. You can pressure-can them if you prefer.
However, over the years the acidity level of tomatoes has changed as gardeners have developed new and sweeter varieties of tomatoes. They are very close to the un-safe level now, even heirloom tomato varieties.
The USDA recommends adding citric acid or bottled lemon juice to canned tomatoes, whether you're using a water bath canner or a pressure canner. This recommendation applies to tomato juice, whole or cut tomatoes, and crushed tomatoes. [Source]
Be safe! Add either 2 Tablespoons of lemon juice (bottled, not fresh-squeezed) or 1/2 teaspoon of citric acid powder per quart jar. If you're using pint jars, add 1Tablespoon lemon juice or 1/4 teaspoon of citric acid per pint jar.
Add the lemon juice or citric acid directly to each jar, before adding the tomatoes to the jar.
Add salt if desired
If you wish to add salt, this is the time to do so. Add one teaspoon of canning salt to each quart jar, or 1/2 teaspoon to each pint jar.

Fill the canning jars
Using a canning funnel, add the tomatoes to the jars. Push them down into the jars to help dislodge any air pockets.
You might want to invest in a set of canning tools to make the process easier. This canning tool set includes a jar lifter, canning funnel, bubble popper, lid lifter and a few extras.
Then fill the jars with boiling water, leaving a half-inch of head space.
You can read more about head space and how to measure it in this post on canning basics. You'll also find tips and tricks to make your canning sessions easier.
Use a plastic knife or a bubble remover tool to dislodge any bubbles and air pockets in each jar.
Next, wipe the rims of the jars with a damp cloth to remove any food residue that might prevent your jars from sealing properly.

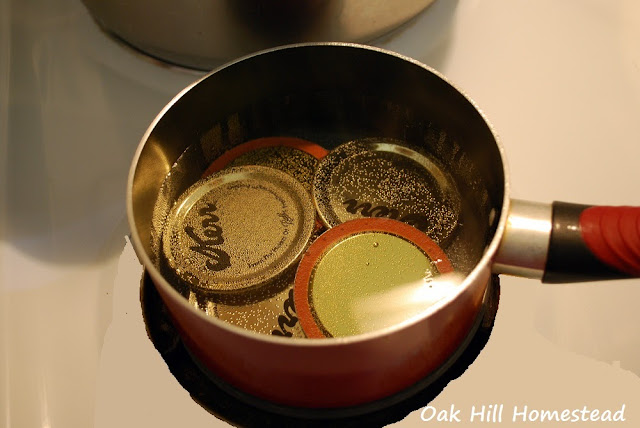
Warm the jar lids in hot water for a few minutes to soften the rubber seal. The USDA no longer recommends boiling the lids.
Add a warm lid to each jar. Top with a screw band and tighten with your fingers. Don't tighten them too tight - "finger tight" is sufficient.

Add your filled jars to the canner
Using a jar lifter, add each jar to the water bath canner that you've partially filled with warm-to-hot water. The full jars will displace some of the water, so don't start with your canner full of water.
Use boiling water to bring the level of water two inches over the tops of the jars.
To measure the water level, touch the top of a submerged jar with a plastic or wooden spoon handle. Pull out the spoon and you'll be able to see how deep the water is by the wet mark on the spoon. Just another tip from my canning basics post!
Now turn up the heat under the water bath canner. When the water comes to a roiling boil, cover the pot and begin timing.
Process pints for 40 minutes and quarts for 45 minutes. Be sure to adjust the canning time if you live more than 1,000 feet above sea level.
When the timer says you're finished, move the canner off the burner. It's very heavy, so be careful.
Then carefully remove the jars with your jar lifter, lifting them straight up without tipping them. Place the jars on top of several thicknesses of folded towels.
Leave your jars undisturbed for 24 hours.
As they begin to cool you should hear PING, PING, PING as the jars seal. What a lovely sound!
Let the jars cool
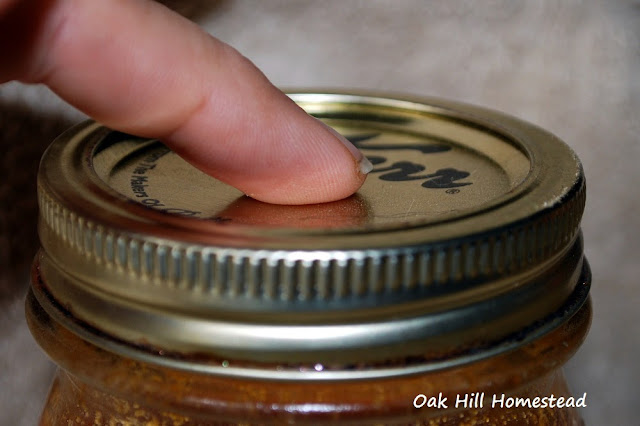
After 24 hours, check the seals by pressing lightly on the jar lids with your finger.
If there is any "bounce" or "give," the jar didn't seal and should be refrigerated and consumed within a day or two.
Wipe down the jars, add a label, and remove the rings before storing your jars.
How to use canned tomatoes
Home-canned tomatoes can be used in many ways. Here are a few ideas:
- Strain them and make salsa
- Use in any dish that uses canned tomatoes, such as chili. You'll find my chili recipe and my made-from-scratch chili seasoning here.
- Sauté onions and peppers and add a jar of tomatoes plus some spices, and cook it all down for homemade spaghetti sauce. It might need to be simmered longer than if you were using paste tomatoes, but it will taste just as good!
- Make homemade tomato soup.
- Sauté chopped celery and onions and add a jar of tomatoes to make stewed tomatoes (NOTE: if you want to can stewed tomatoes instead of plain tomatoes, you must use a pressure canner. You can add these ingredients to your already-canned tomatoes before serving though.)
- Make a pot of albondigas soup
- Pour off the liquid from the jar and then blend the tomatoes in your blender to make tomato sauce
Remember, as long as you add citric acid or lemon juice to bring up the acidity, tomatoes can be water-bath canned.
However, if you add any other vegetables such as peppers, onions or celery, etc., you must use a pressure canner and follow an approved recipe.
No matter what variety of tomatoes you planted in your garden, you can preserve them to enjoy all winter long!
For more simple living and frugal ideas and inspiration subscribe to The Acorn, Oak Hill Homestead's weekly-ish newsletter, and join me on Facebook, Instagram and Pinterest. I'd love to see you there!
How to Store Fresh Produce so It Lasts Longer (podcast episode with guest Amy Cross)
Foods to Can in Winter


